Please use the following search box to quickly locate valuable FAQ support guide.
You can use key words or full statement to search by. Alternatively you can simply browse by Category belowPre-Installation Requirements
It is important to prevent under powering the sensor, or turning off USB device power that the following Power related options are turned off.
Please follow the following guides to adjust device power management and Adjusting Power Plans.
CleverOne Users:
For New Clever One users, Install Version 6.21 Update first
For Existing Clever One users already using EzSensors; when adding or installing additional sensors skip to Install EzSensor Calibration Data section.
Update EzSensor Caputre Program:
Download and update the EzSensor Version 6.21 Update (This is also included in the CleverOne Download files)
Note: Do note use for EzDent-i Users.
Install EzSensor Calibration Data:
In this section you will use the supplied USB supplied with each sensor to install the calibration data using the OneClick installation using the Additional Installation button. You will repeat this step for each sensor to be installed.

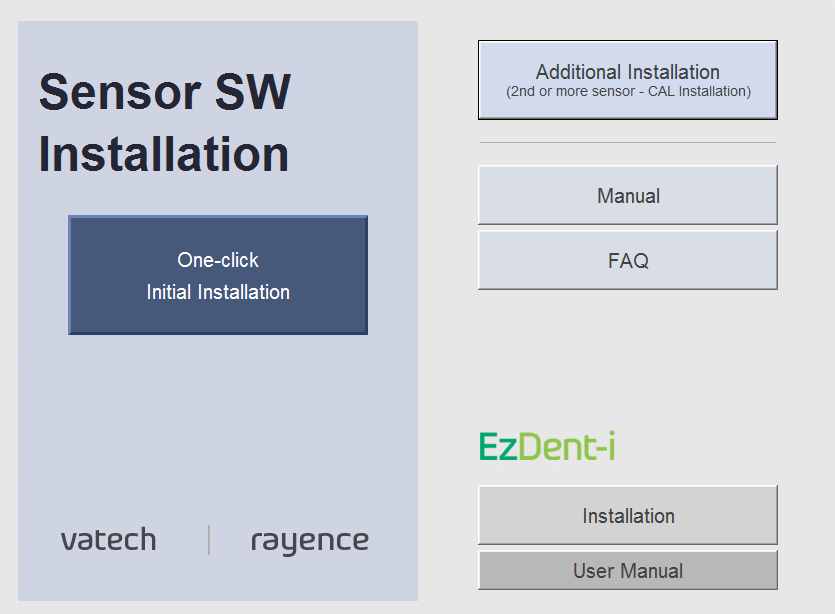
One Click Quick Installation Guide & Configuration:
Use the following videos for EZSensor's that use the One click installation wizard.
EzSensor Twain & Compatibilty:
By Default, the autoadvance installs with the installer of the sensor; please note that not all IMS will require the Advanced - Autoadvance twain*
Updated Advanced - AutoAdvance Twain: Typically this is for Eaglesoft* and might be required for some others* please check the default Autoadvance twain installed before updating to the Advanced-AutoAdvance twain below.
For full information for Compatibility please review the Compatibility Chart FAQ guide before updating TWAIN driver.
FAQ: EzSensor Twain Installer:
DLL Load error:
In the rare event you get a DLL load error follow the EzSensor DLL FAQ guide
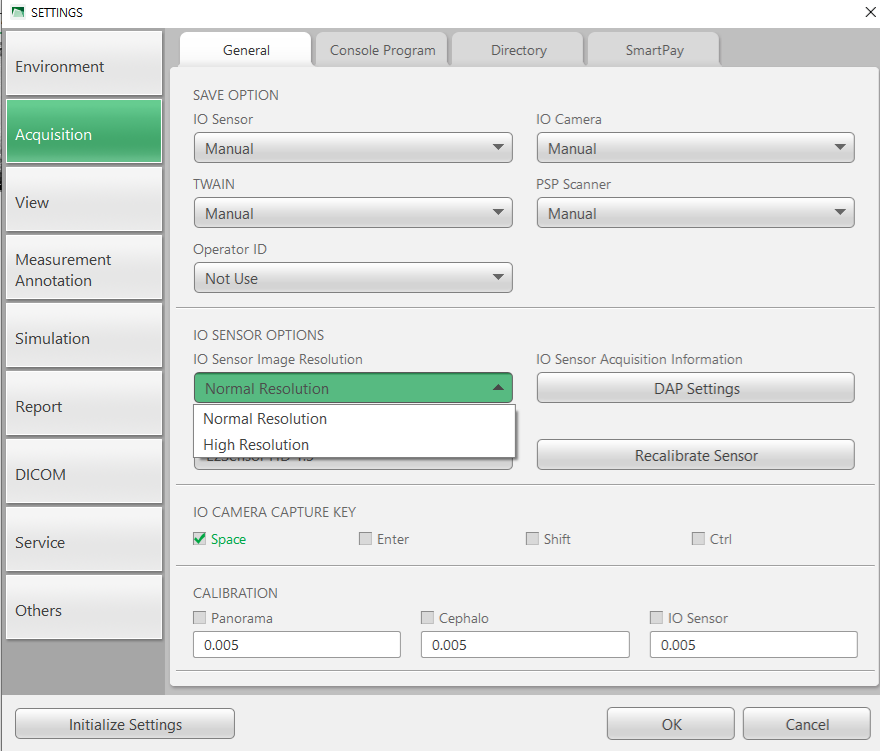
IOX Sensor Image Resolution Options (Optional)
EzDent-i offers advanced Sensor Image Resolution Options if the customer wishes to enable a higher resolution viewing rate. The default factory setting is 'Normal'
Legacy & Previous IOX devices :
Use the following videos for previous generation EZSensor's that do not use the One click installation wizard.
Installing Initial Sensor:
Installing Additional Sensors: