Please use the following search box to quickly locate valuable FAQ support guide.
You can use key words or full statement to search by. Alternatively you can simply browse by Category belowThere are a few ways you can actually export or send 2D Pano, Ceph images or Screen Shots. You can export them to save on local USB Flash driver or CD or you can simply e-mail the images.
To learn more about e-mailing the image please Click here - How do I email images from EzDent-i
If you would rather export them locally for saving onto USB drive, CD or other media the first thing you will want to do is open the patient chart to access the images as shown in the figure below.
VIdeo Guide:
Written Guide:
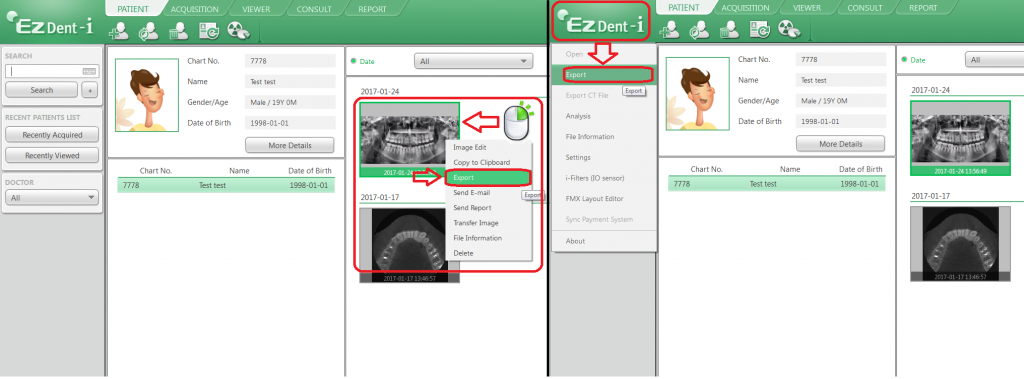
There are 2 ways you can export the image; choose the most productive manner for you.
Option 1 is to select the image as shown below and by 'right clicking' on the image you can choose 'Export'
Option 2 is to select the image as shown below and clicking the "EzDent-i" logo and then from the drop down clicking 'Export'
In either option you will open the same Export window where you can either choose to Save the File to CD/DVD directly -OR- to the Local Disk.
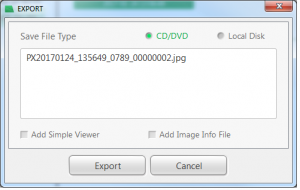
To Export directly to CD/DVD, select the CD/DVD option if not already selected and click "Export" this will then burn the Image selected to a black disk you can then send with the patient.
If you would rather Save the image locally for USB or other media, simply choose 'Local Disk' instead and click Export. This will open a pop up windows which is essentially a 'Save as' browse window normally seen in most programs.
Simply choose the export location of your chose (in this example we are saving to the desktop), in the File Name Field give the image a name. Typically the patients name will suffice.
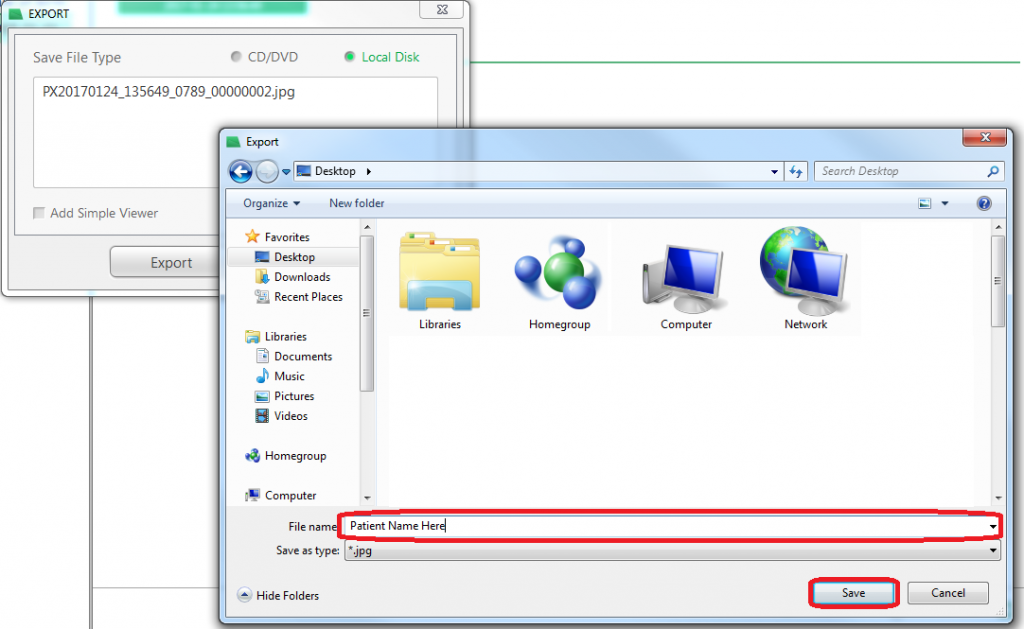
Click Save and exporting will be started. Please do not turn off the PC or disconnect power while saving from the database is under way.
Once export is finished you can then access the image in the file path chosen