
Please use the following search box to quickly locate valuable FAQ support guide.
You can use key words or full statement to search by. Alternatively you can simply browse by Category belowPreinstallation of CleverSpace Requirements
If not currenlty using the required versions, have your IT update using the following guides
You can verify the version by checking Add & Remove programs / Uninstall a Program or Appliation and checking the version informaiton.
Setup:
Note: You will need a One ID account
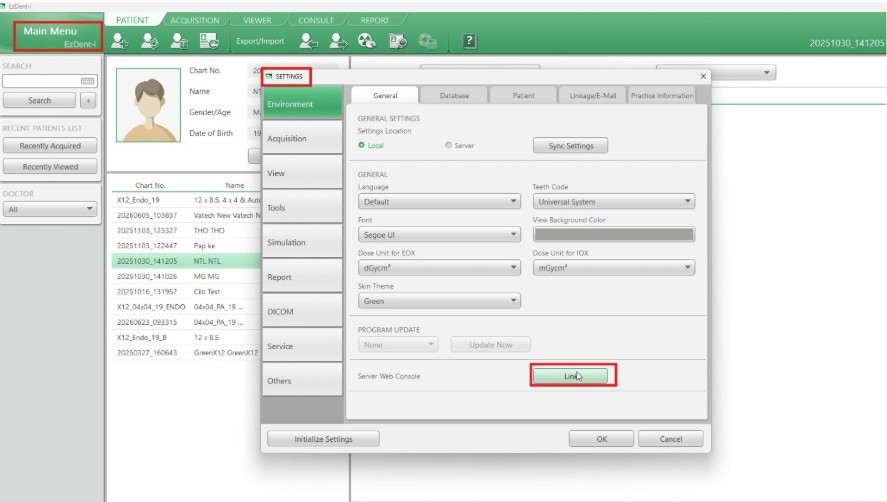
Open EzDent-i (should be version 3.5.30)
Click "Main Menu" and navigate to the "Settings" tab
Find the Server Web Console section and click "Link"
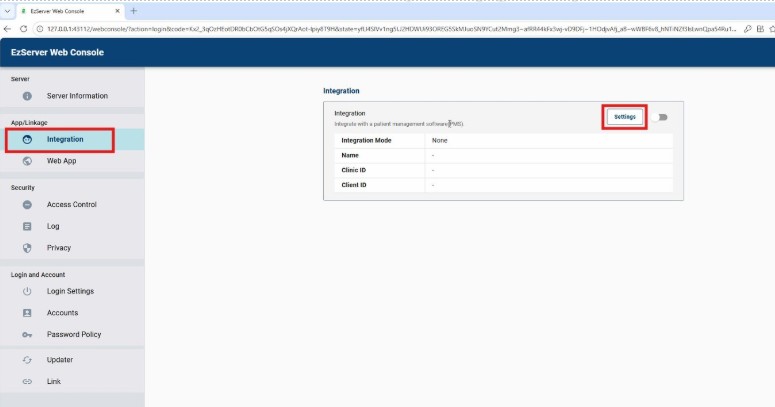
Log in with ID: Master Admin PW: 0000
Once opened log in and click the "Integration" tab and then "Settings"
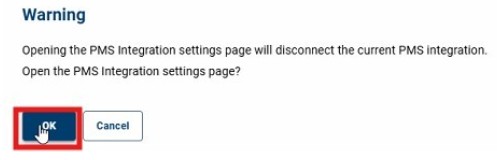
Skip over warning by clicking "OK"
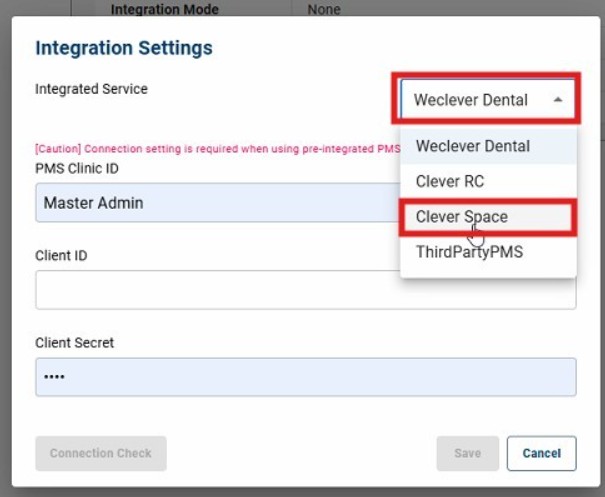
Select Clever Space in the dropdown menu
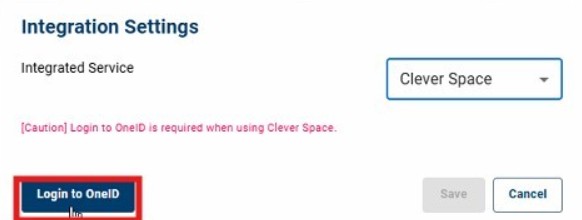
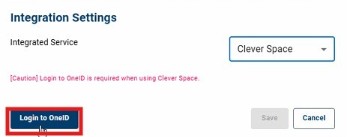
Proceed with the "Login to OneID" button
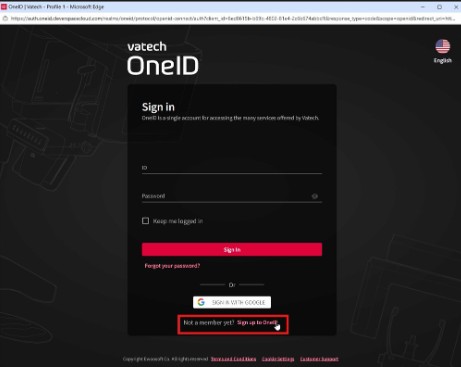
You will need a One ID account
This Is where the One ID account is made
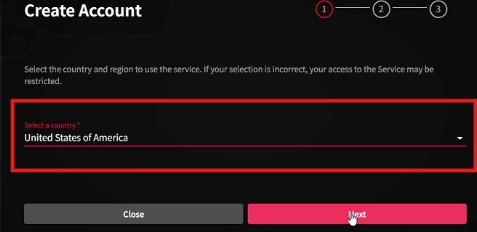
Step One is the Country
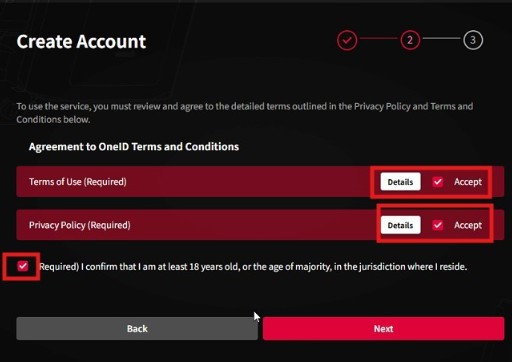
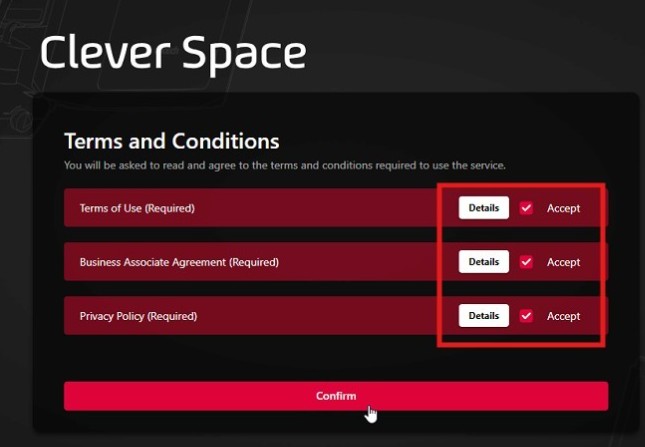
Step Two is the agreement
You must click "Details" and there will be a pop up of the description
Scroll down to click the "Confirm" button on the bottom for each
Make sure you also check the (Required) 18 years or older box
Step Three is the office information
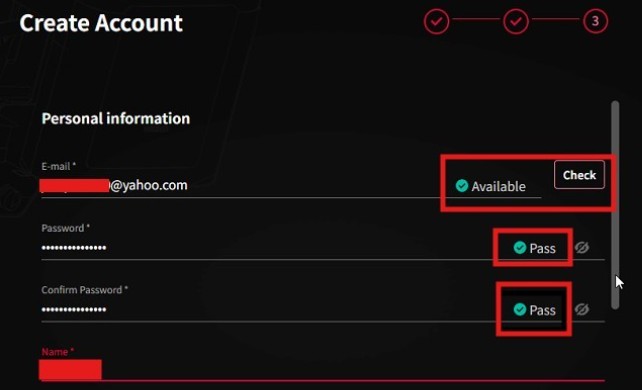
You will need to fill out the credentials for the practice that are listed
Make sure you hit the "Check" button to display the "Available" sign and have the passwords match what is required for a strong password to display the "Pass" sign
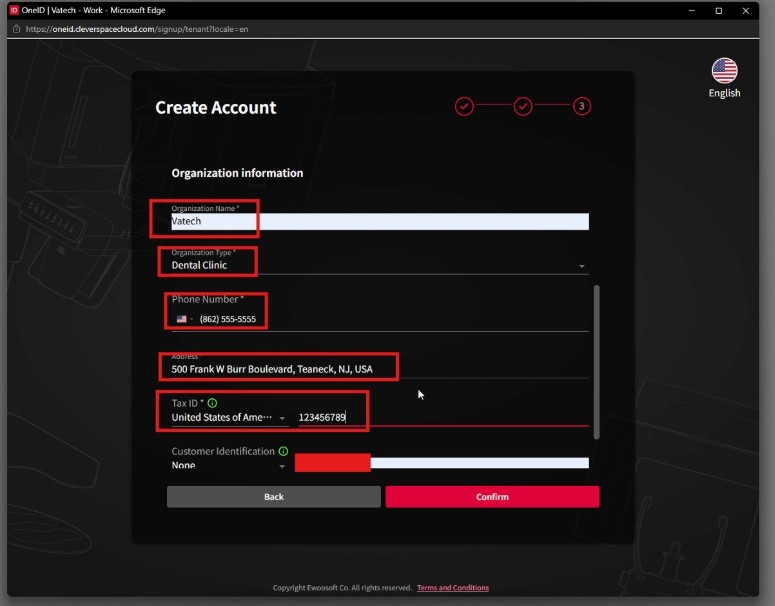
Must fill out the following credentials:
Organization Name
Organization Type
Phone Number
Address
Tax ID
Optional but not required:
Customer Identification
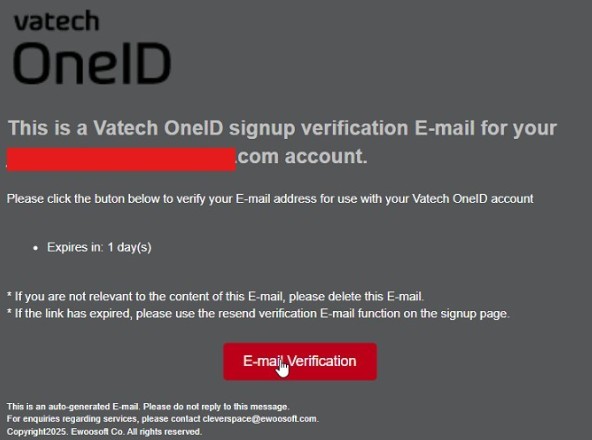
There will be a verification email sent and you must confirm the email
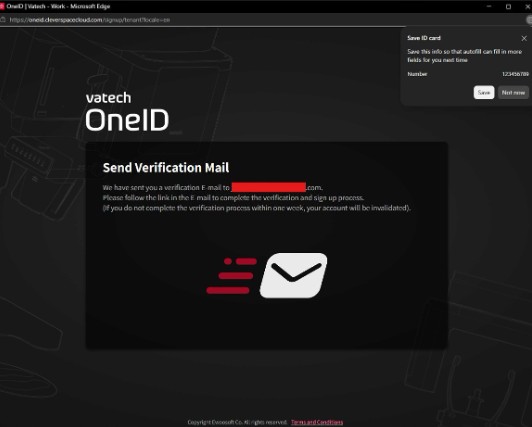
Verification E-mail will be in your email used to sign up with.
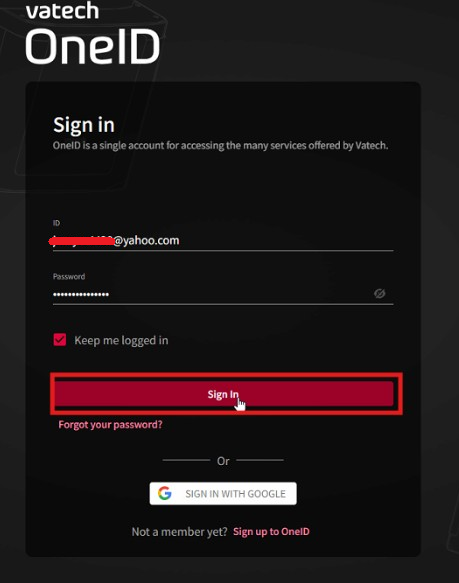
Go back to the EzServer web console and log in using the account you have just created
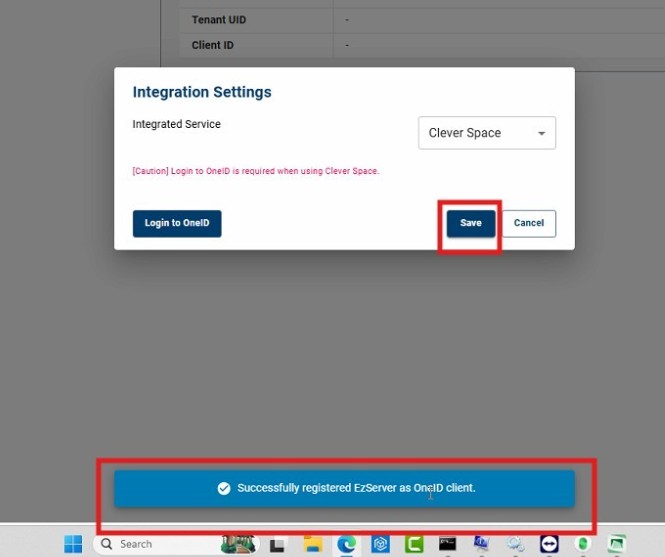
There should be a confirmation at the bottom once logged in
Make sure to hit the "Save" button
Open EzDent-i (should be version 3.5.30)
Click "Main Menu" and navigate to the "Settings"
Click "Other", find the "Clever Space" tab and "Enable"
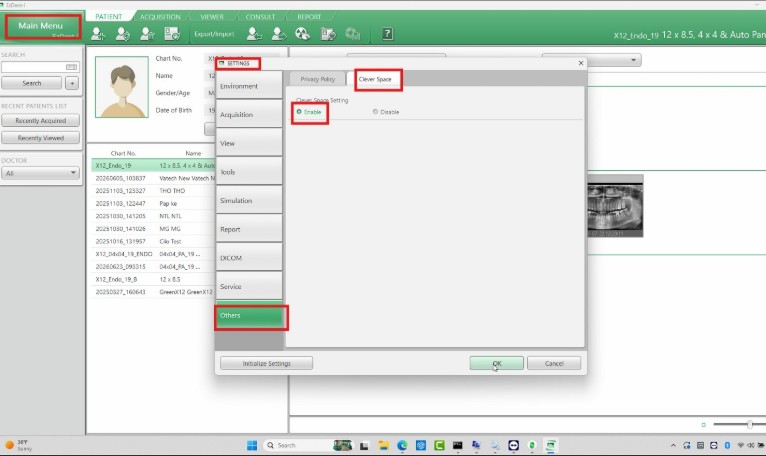
Close out of EzDent-i to ensure that the change to enable Clever Space was made
Open EzDent-i and there should now be a dropdown menu next to Export/Import that can show Clever Space buttons
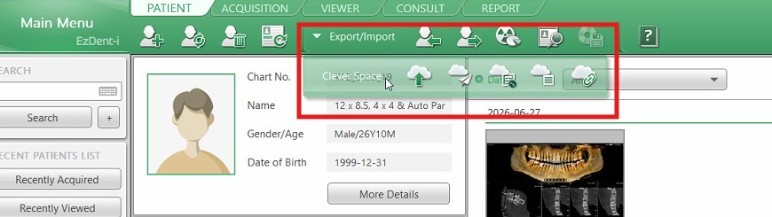
For the first time you must go through more confirmation
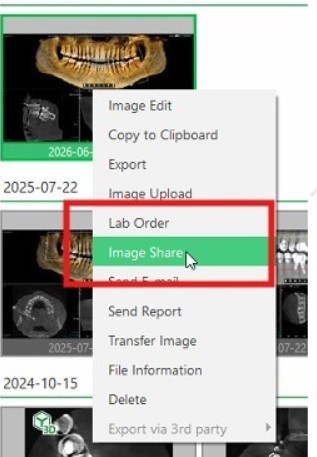
Right click an image and click "Image Share" and the password is: 0000
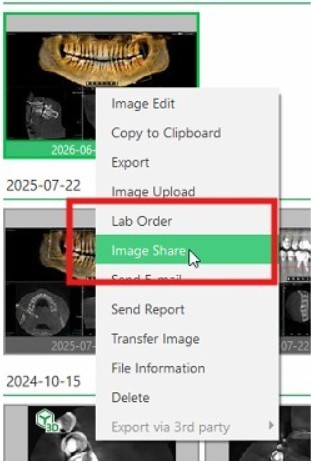
It will open a "Login Successful" page to confirm the link to Clever Space
Just go back to EzDent-i and there is a "Go to Clever Space" button
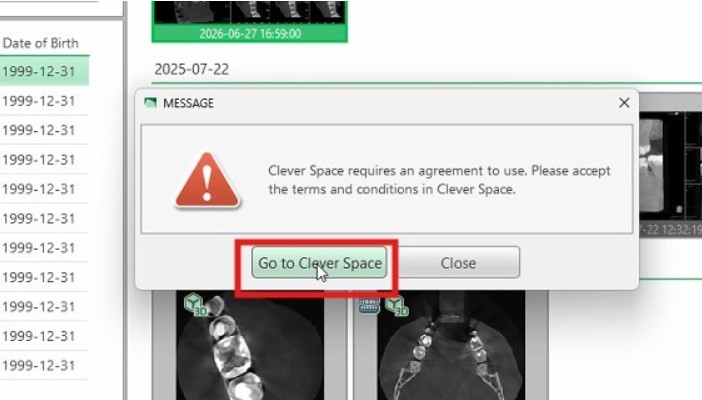
Accept the Terms and Conditions by viewing "Details" and clicking "Confirm" at the bottom
Select a Cloud storage plan and then complete the sign up process.
How to Use Clever Space
Go back to EzDent-i, Open the desired patient and locate the image you wish to share.
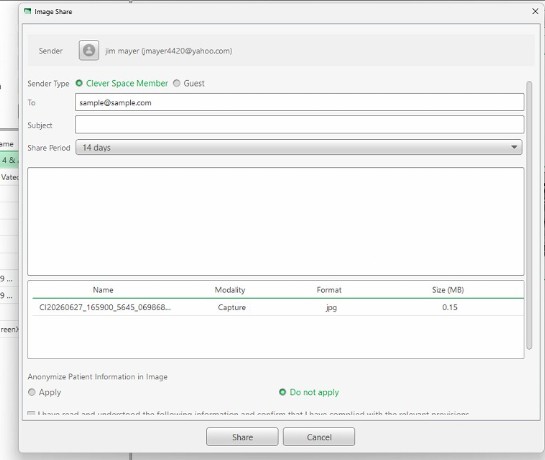
Right click an image and select "Image Share"
Clever Space should open "Image Share"
Fill out any desired information and click share.